This tutorial will guide you through installing Tasmota on Ledvance smart plugs. If you found here, you are likely familiar with all the terms used in this post. However, just for the record, here is what are we talking about.
What is Tasmota?
Tasmota is a very popular free and open-source firmware for Espressif WiFi devices (ESP8266, ESP8285, ESP32). It allows to control devices using MQTT, web UI, HTTP or serial. You can automate device activities using timers, rules or scripts. Integration with home automation solutions is built-in as well.
What is Ledvance?
Ledvance is a German multinational LED lighting and smart home technology company. It evolved from the divestment of Osram in 2016 and is owned by Chinese light source manufacturer MLS.
Why installing Tasmota on Ledvance smart plugs?
Given that Ledvance is owned by a Chinese company it is no surprise that their IoT devices use the Tuya platform (hardware, software, cloud). Therefore, like with most consumer-grade IoT / home automation products, the Ledvance devices also rely on a cloud infrastructure. In this case your data is going to end up in a Chinese cloud. Regardless of vendor nationality and regardless of industry, such vendor lock-in is an absolute no-go for me. There are enough examples of companies pulling the plug on their cloud infrastructure after a few years – rendering devices depending on it useless. Sad for customers and disastrous for the environment. What a waste. I would like to avoid that at all costs.
What I do instead is this.
- If an IoT device relies on Espressif chips and proprietary firmware, I open it and flash Tasmota. Example: Sonoff smart plugs.
- If the device uses a Tuya chip, I first replace that with an Espressif chip and then flash Tasmota. Example: Ledvance smart plugs.
Open Ledvance smart plug
Opening the case of a Ledvance smart plug is not too difficult. It is not as easy as it could be either. The front and back parts of the plug are held together with a single screw and two snap-fit latches; nothing unordinary. However, the screw uses a tri-point drive and the snap-fit is really really tight. Thankfully, Ledvance did not seal the bond with adhesives or plastic welding.
Watch out! The two parts are internally connect with a flat three-strands wire that runs from the main PCB to the satellite LED PCB. Be very careful when you separate the plastic parts until you unscrewed the LED PDB!


Replace Tuya WB2S with ESP-02S
The Ledvance smart plug uses a Tuya WB2S module (WiFi microcontroller). In order to install Tasmota on Ledvance smart plugs, the WB2S module needs to be replaced with a pin-compatible module powered by an ESP8266, ESP8266, or ESP32. At the time of writing your options are ESP-02S, WT-01N or WT32C3-01N.
In an ordinary process we would now remove the original Tuya WB2S module and insert an ESP-02S module in its place. However, this would make installing the Tasmota firmware onto the ESP-02S more complicated. Instead, we will now desolder the Tuya WB2S module, flash Tasmota to the ESP-02S (documented below) and only then insert it into the main PCB.


For great desoldering tips and techniques I invite you to watch the videos of “Mr SolderFix”. Especially helpful is the video embedded below.
Install Tasmota
Flashing ESP-02S and similar modules is a rather low-level task (in terms of abstraction). If I had to do this more often, I would probably build a jig to simplify and speed up the process.
You need a serial-to-USB converter and five wires; I use jumper wires (Dupont cables). On the converter side I glued the female end of four wires together with super-glue for easier handling. On the other side I soldered the male ends to the ESP-02 as per the wiring table below. Note how you need an extra wire from GND to IO0 to put the device into flash mode. I “forked” this extra wire from the main GND wire. This makes this a simple but very flexible, general-purpose flashing tool for many devices.


| Serial-to-USB | ESP-02S |
|---|---|
| GND | GND |
| 3V3 | 3V3 |
| RX | TX |
| TX | RX |
| GND | IO0, to put device in flash mode |
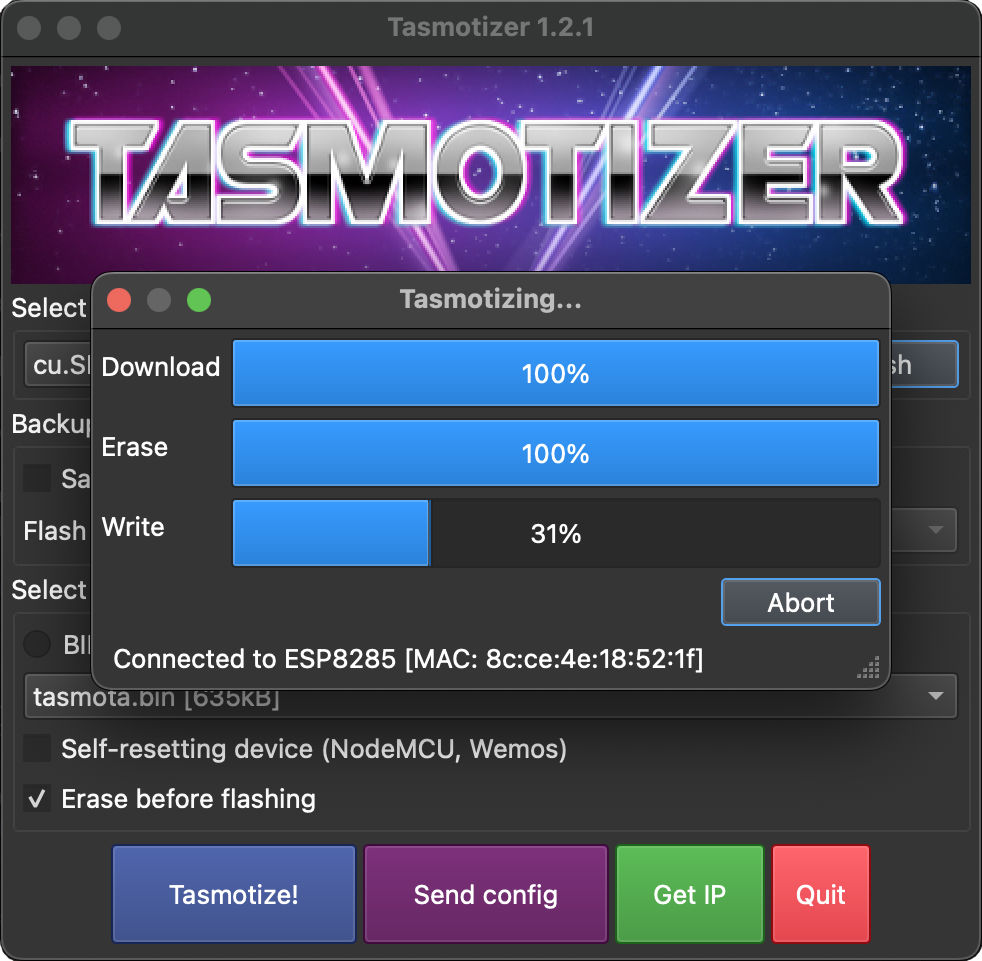
Once you connected the serial-to-USB converter to the ESP-02S (incl. GND->IO0), you will connect the converter to your computer. The next step is to download and run Tasmotizer, the Tasmota flashing tool. Select the correct USB port, select “Release” in the “Select image” section, then hit “Tasmotize!”
The final step is to transfer the Tasmota device configuration to the ESP-02S device. Hit “Send config” and enter your WiFi credentials in the dialog that opens. Furthermore, in the “Module/template” section you select “Template” and paste a template matching your device. For my Ledvance CH plug I got the configuration from blakadder’s repository.
{"NAME":"Ledvance Plug CH","GPIO":[0,0,0,288,32,0,0,0,2656,224,2720,0,0,0],"FLAG":0,"BASE":18}I highly recommend testing the ESP-02S standalone before you install it back into the Ledvance plug. Hence, you should remove GND from IO0 and power cycle it. After it successfully connect to the configured WiFi you can browse its web UI through the assigned IP address.